

Affiliate disclosure: FilamentPicks is reader-supported. Some links below are affiliate links. As an Amazon Associate, we earn from qualifying purchases at no extra cost to you. Recommendations are research-based and not paid placements.
X2D purge waste can be reduced safely through better filament grouping before changing transition values. The X2D’s second nozzle can reduce the amount of material thrown away during multi-filament work, but there is no honest universal “best flush volume.” Color opacity, material pairing, nozzle assignment and model geometry all change how much transition material is safe.
X2D purge waste: filament-grouping modes explained
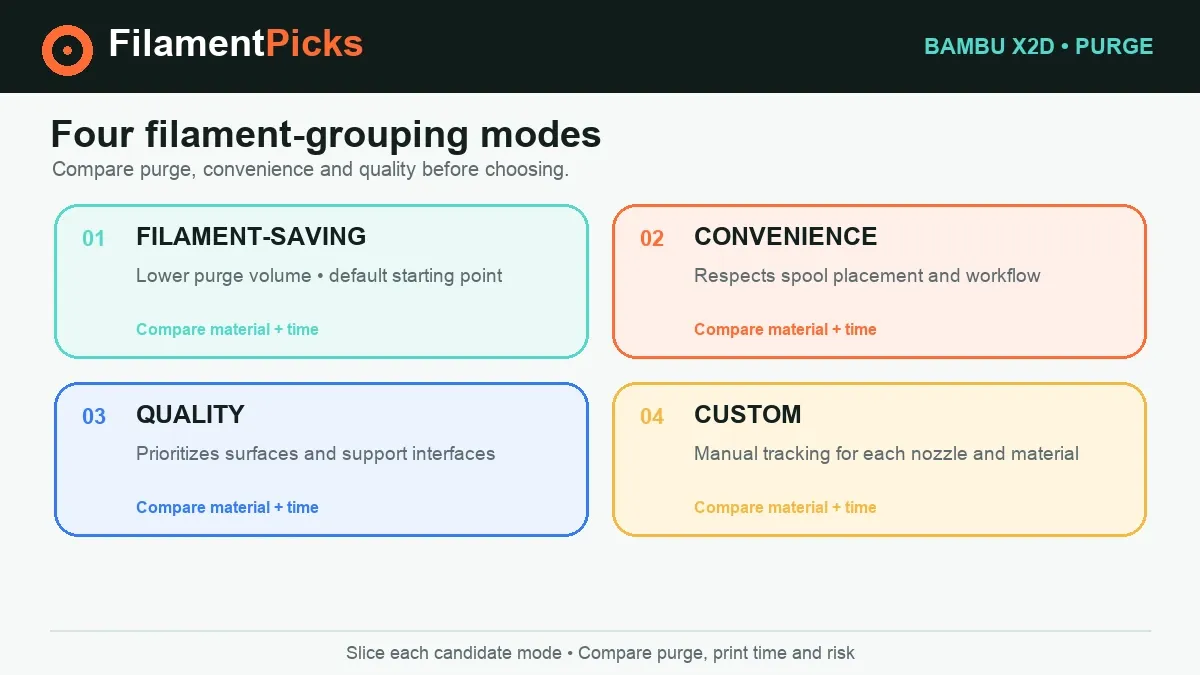
Bambu Studio groups project filaments across the X2D’s two tracks/nozzles. That mapping influences how many unload-load transitions occur and how much cleaning material the job needs. The X2D manual documents four distinct priorities.
| Mode | What it prioritizes | Best use | Main trade-off |
|---|---|---|---|
| Filament-Saving | Groups filaments to reduce purge material; it is the default mode. | Most everyday multicolor projects where material efficiency matters. | May create more filament changes; lowest waste does not automatically mean shortest print. |
| Convenience | Respects the physical filament placement in the connected AMS units. | A quick setup when you do not want to rearrange loaded spools. | The convenient mapping can consume more transition material. |
| Quality | Surface accuracy and support-interface handling, including auxiliary-nozzle use. | Visible surfaces, support interfaces and demanding material roles. | Quality is prioritized over the smallest purge total. |
| Custom | Manual control of filament-to-track/nozzle mapping. | Experienced users with a clear material-pairing plan. | You own the mapping decision; review Studio’s recalculated saving estimate. |
Before assigning a pairing, make sure both materials are mechanically suitable for the X2D. Our X2D filament compatibility guide covers abrasive, flexible and high-temperature constraints, while the best-filament guide for X2D helps with simpler same-family combinations.
A safe workflow to reduce X2D purge waste
- Update to a stable Studio release supported by your printer. This article uses the public 2.7.1.62 line as its reference. Do not build an important job around a beta-only switch without accepting beta behavior.
- Choose the exact filament profiles. Correct material, color and nozzle information gives Studio better inputs. A generic profile with the wrong temperature or flow limit can create problems that no grouping mode fixes.
- Start with Filament-Saving. Slice once and record estimated purge, total filament and time. That becomes the baseline rather than a guess.
- Compare the other relevant mode. If surface finish is critical, compare Quality. If the current spool placement matters, compare Convenience. Custom is useful only when you understand why a different mapping helps.
- Inspect transitions, not just the total. A dark-to-light color change often needs more protection than a light-to-dark one. Dissimilar materials may also require more cleaning than two colors of the same formula.
- Print a small representative test. Use the same colors, materials, nozzle assignments and wall style. Look for tinting, weak interfaces, nozzle ooze and support separation before committing to a large print.
- Reduce one variable conservatively. If you alter a transition amount, keep notes for that exact pair and direction. A successful black-to-red test is not proof that red-to-white is safe.
Choose pairs deliberately
Grouping similar colors and materials can be easier on transitions, but nozzle choice also depends on temperature range, abrasion and support strategy. If one filament is carbon-fiber-filled, confirm nozzle suitability first with our X2D nozzle-size and material guide. Waste savings are not worth using the wrong hardware.
Use Filament Track Switch when it removes unnecessary changes
Bambu Studio’s X2D support includes Filament Track Switch, which can route a filament to both tracks/nozzles in appropriate projects. This gives the slicer more mapping flexibility and can avoid transitions that would exist if a material were locked to one path.
It does not mean every filament should be available to both nozzles. Check nozzle diameter, nozzle material, temperature compatibility and the role of each filament. A support material assigned to a dedicated auxiliary nozzle may be part of the quality strategy, while a common model color can be a better candidate for flexible routing.
One common model material
A frequently used filament can be made available to both paths when nozzle hardware and temperatures match, giving Studio more efficient mapping options.
Different functional roles
A support interface, abrasive composite or temperature-mismatched pair may benefit from deliberate separation rather than maximum routing freedom.
Flush into objects’ infill or support—without hiding a problem
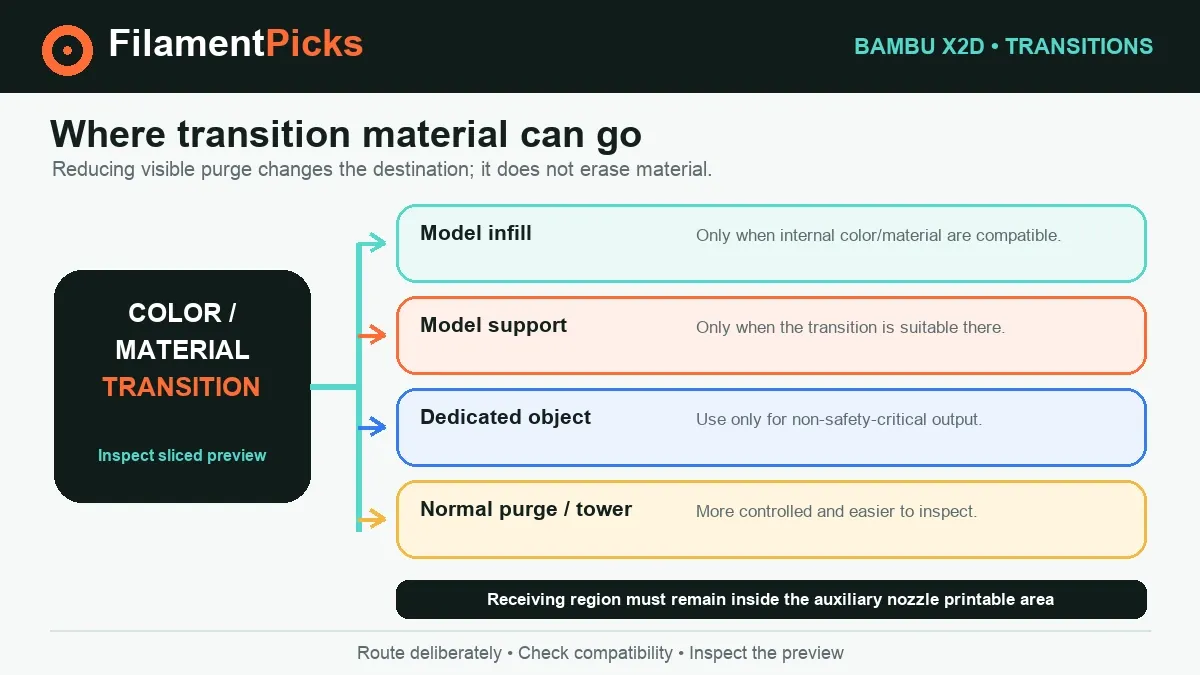
The documented “flush into objects’ infill/support” option can place transition material inside non-visible regions instead of sending all of it to waste. It is useful when color contamination inside the part is acceptable and the material remains appropriate for that structural or support role.
On X2D, the purge path must remain within the auxiliary nozzle’s printable area. Studio’s geometry and preview matter: inspect where the transition material goes, whether the receiving object is reachable, and whether its appearance or strength could change.
| Destination | Use it when | Avoid or test carefully when |
|---|---|---|
| Model infill | Internal color does not matter and the transition material is compatible with the part. | Thin/light shells may show dark infill; mixed materials can weaken or change thermal behavior. |
| Model support | The material remains suitable for support and the target lies in the allowed nozzle area. | A different material may change adhesion and support removal. |
| Dedicated object | You can accept color variation in a useful secondary part. | Do not make a safety-critical part the uncontrolled purge receiver. |
| Normal purge/tower path | Clean color or material separation is the priority. | Uses more material, but provides a more controlled transition. |
Open the sliced preview and step through every tool/material transition. The correct question is not merely “Did the waste number fall?” but “Where did that material go, and is the resulting part still acceptable?”
Flush volume does not fix nozzle oozing
Purge and ooze are related to transitions but are not the same failure. Purging cleans the material path. Oozing is material leaking from an idle or traveling nozzle. The X2D manual points to causes such as wet filament, insufficient retraction, long travel and an unsuitable nozzle or material setup.
| What you see | Likely category | Check first |
|---|---|---|
| Next color is visibly tinted | Insufficient transition cleaning | Restore Studio’s calculated purge and test the exact color direction. |
| Fine strings from the parked nozzle | Oozing/stringing | Moisture, temperature, travel and profile-specific retraction. |
| Weak boundary after a material swap | Material contamination or incompatibility | Pairing suitability and adequate separation—not just color cleanliness. |
| Waste is low but print time rises | Grouping trade-off | Number of filament changes in Filament-Saving versus another mode. |
Developer Mode is not the first stop
The manual documents “Enable Tower interface features” in Developer Mode, applying dedicated temperature, pre-extrusion and purge parameters at prime-tower contact. This is an advanced control, not a required standard setting. Build a stable result with normal documented modes first; advanced parameters can easily add variables faster than they add savings.
Frequently asked questions
Which X2D mode uses the least purge material?
Filament-Saving is explicitly designed to reduce purge and is the default. It can create more filament changes, so compare both material and time estimates for your project.
What is the best X2D flush-volume multiplier?
Bambu does not publish one universal value. Safe transition volume depends on colors, formulas, direction of change, nozzle assignment and model geometry. Use Studio’s calculation as the baseline and validate any reduction with the exact pair.
Can I set purge to zero with dual nozzles?
There is no official zero-purge guarantee. The second nozzle can reduce unnecessary transitions, but a path that changes filament still needs enough cleaning to protect color and material integrity.
Can X2D flush into infill and support?
Yes, Studio documents that option, provided the purge path stays within the auxiliary nozzle’s printable area. Inspect the preview and avoid mixing unsuitable materials inside a functional part.
Does Filament Track Switch eliminate all waste?
No. It provides more routing flexibility and can avoid some unnecessary changes. It cannot remove every required cleaning transition, prime action or model-dependent waste source.
Why does my idle nozzle ooze after I reduced purge?
Oozing is not solved by adding or subtracting flush volume. Check filament dryness, temperature, retraction, long travel and nozzle suitability using the exact profile.
Should I use Quality or Filament-Saving mode?
Use Filament-Saving when material efficiency leads. Use Quality when surface precision or support-interface behavior matters more. Slice both and compare, because the best trade-off is model-specific.
Polymaker color pairing
Using consistent formulas for both colors makes transition tests easier to compare. Check the exact material before ordering; code BALUTAVLAD may apply where eligible.
See Polymaker PLA →Filament dryer
Dry material reduces oozing variables, so the purge test measures color transition rather than moisture-related stringing.
Compare dryers on Amazon →Affiliate links support FilamentPicks at no extra cost to you. No fixed price or stock claim is made.
Sources
- Bambu Lab X2D User Manual v1.0, May 2026, especially pages 74–79 and 123–124.
- Bambu Lab: X2D launch and dual-nozzle workflow overview, April 14, 2026.
- Bambu Studio 2.5.3: X2D and Filament Track Switch support.
- Bambu Studio 2.7.1.62 public release, June 16, 2026.