

Disclosure: FilamentPicks is reader-supported. As an Amazon Associate we earn from qualifying purchases. Polymaker links may also earn us a commission, at no extra cost to you. Editorial recommendations remain independent; the settings below do not replace the range printed on your spool.
The best Bambu A1 Mini PETG settings are not one magic profile. They are a controlled starting point: dry filament, the correct manufacturer preset, a clean PEI plate, and a speed that stays inside the spool’s melt-flow limit. Get those four things right and the A1 Mini can produce clean functional PETG parts without turning every travel move into a web of strings.
Bambu A1 Mini PETG settings: official limits vs a test profile
Bambu Lab lists PETG as an ideal material for the A1 Mini. The printer has an all-metal hotend rated to 300°C and a build plate rated to 80°C, so ordinary PETG is comfortably within its hardware envelope. Those machine limits do not tell you how fast a particular spool can melt, however. PETG chemistry, pigment and high-flow additives can change the usable temperature and volumetric flow substantially.
The first two rows are current A1 Mini profile baselines. The third contains product-level guardrails for Bambu PETG HF; these take priority if an internal slicer range is wider. For another brand, duplicate Generic PETG, follow that spool’s TDS and calibrate the copy.
| Profile | Nozzle | Bed | Flow / cooling | Drying |
|---|---|---|---|---|
| Generic PETG — current A1 Mini profile | 255°C; profile range 220–270°C | 70°C | 8 mm³/s; flow 0.95; fan 40–90% | Use the exact spool maker’s TDS |
| Bambu PETG HF — current A1 Mini profile | 230°C first layer; 240°C after | 70°C | 18 mm³/s; flow 0.94; fan 30–50%, overhang 100% | Product guidance applies |
| Bambu PETG HF — product guardrails | 230–260°C | 65–75°C with glue | Below 300 mm/s; do not convert this to a promise for every model | 65°C for 8 h; print/store below 20% RH |
If you want a cross-printer reference before making a custom profile, open our complete Bambu PETG settings guide. The narrower workflow here is specifically for the A1 Mini’s 180 × 180 × 180 mm build volume, open frame and 80°C maximum bed.
👉 See also: Bambu P1S PETG settings — a reliable starting profile for clean, strong prints · Bambu A1 Mini TPU settings — 95A profile, feeding and fixes · Bambu Lab print not sticking? — 12 bed adhesion fixes.
The five-minute setup that prevents most PETG failures
- Dry a suspect spool first. Popping, a frosted surface and persistent fine hairs are moisture clues. Bambu requires PETG HF to be dried before use and kept moisture-free, especially on prints longer than six hours. See our PETG drying workflow for dryer, AMS 2 Pro and heatbed methods.
- Clean the plate. Wash a cool PEI plate with warm water and plain dish soap, rinse it, and avoid touching the print area. Isopropyl alcohol is useful between prints but does not always remove every oily residue.
- Select the exact filament preset. Use the Bambu profile for a Bambu RFID spool. For another brand, select its named preset if Bambu Studio provides one; otherwise duplicate Generic PETG and tune the copy.
- Confirm printer, nozzle and plate. A correct material profile cannot rescue a project sliced for the wrong plate or nozzle diameter.
- Calibrate before a long part. Run flow dynamics and flow-rate calibration for a new brand or color, then print a small temperature or stringing test. Save the result under a clear spool name.
Plate caution: PETG can grip smooth PEI very aggressively. When the plate or filament maker calls for glue, the glue may act as a release layer as well as an adhesion aid. Let the plate cool before removing the part, and never pry hard against a hot surface.
Nozzle and bed temperature: tune one variable at a time
Nozzle temperature
Start at the middle of the spool maker’s range. If the range is 230–250°C, 240°C is a sensible first test. Raise temperature in 5°C steps when layers separate easily, extrusion looks matte and under-filled, or the extruder cannot maintain flow. Lower it in 5°C steps when the spool is dry but the nozzle oozes heavily, corners develop blobs, or fine strings get worse.
Temperature and speed are linked. A profile that looks excellent at 80 mm/s may under-extrude at 160 mm/s because the hotend must melt twice as much material per second. Do not “fix” that solely by adding heat. First check the material’s maximum volumetric speed and reduce it until extrusion is consistent.
Bed temperature
Use the selected plate’s Bambu profile as the primary authority. For a generic textured or smooth PEI test, 70°C is a cautious starting point, with the A1 Mini’s official 80°C bed maximum as a hard ceiling. Increase the bed in 5°C steps only when a clean plate and correctly squished first layer still lift. Reduce it if the base spreads excessively or removal remains difficult after cooling.
Because the A1 Mini is open, cold drafts can affect tall, broad parts. Move the printer away from an air conditioner or open window rather than placing it in an unapproved enclosure. Bambu does not recommend the high-temperature engineering materials that normally require an enclosure for this model.
A reliable PETG speed strategy for the A1 Mini
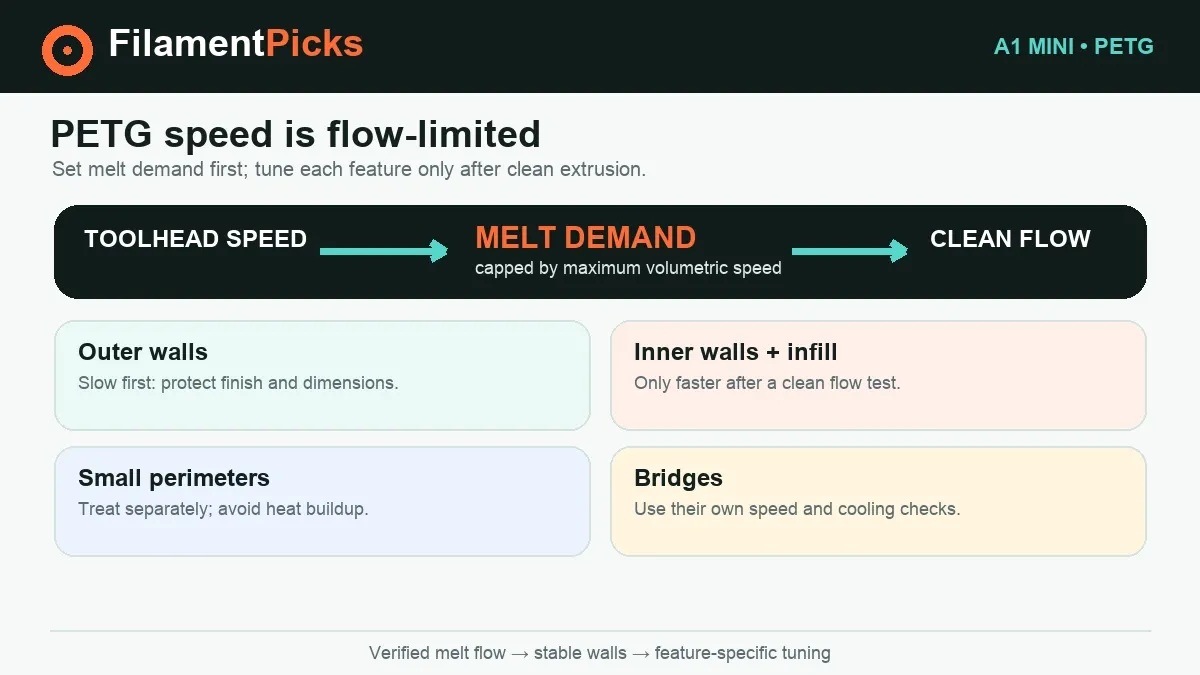
The A1 Mini can move its toolhead at up to 500 mm/s, but that is a machine capability—not a promise that standard PETG can be extruded at that speed. For a new third-party spool, prioritize consistent melt flow:
- First layer: 20–30 mm/s for easier inspection and dependable adhesion.
- Outer walls: 60–100 mm/s to protect surface finish and dimensions.
- Inner walls and infill: 100–150 mm/s if the flow test remains clean.
- Small perimeters and bridges: slow them separately; geometry and cooling, not headline speed, control these features.
These are diagnostic starting ranges, not limits. The current A1 Mini profiles make the material difference clearer: 8 mm³/s for Generic PETG versus 18 mm³/s for Bambu PETG HF. Let Bambu Studio’s volumetric-flow cap govern the fast features, and raise a copied generic profile only after a flow test shows continuous, well-bonded extrusion.
Cooling, retraction and travel
PETG usually needs less routine part cooling than PLA because excessive fan can weaken layer bonding. Begin with the filament preset: current A1 Mini baselines use 40–90% for Generic PETG and 30–50% for Bambu PETG HF, with 100% reserved for HF overhang handling. Those are profile values, not a command to lock one percentage across every layer. If an overhang curls, add cooling or slow that feature; if a strong part snaps between layers, reduce cooling or add a little nozzle heat.
Keep retraction close to the Bambu direct-drive machine preset, currently 0.8 mm at 30 mm/s for the A1 Mini profile. That is a baseline, not a universal stringing cure. Large, copied Bowden-style distances can create inconsistent restarts or jams. Before changing retraction, dry the spool and tune nozzle temperature. Then adjust only in small increments, print the same test again, and watch both the strings and the seam.
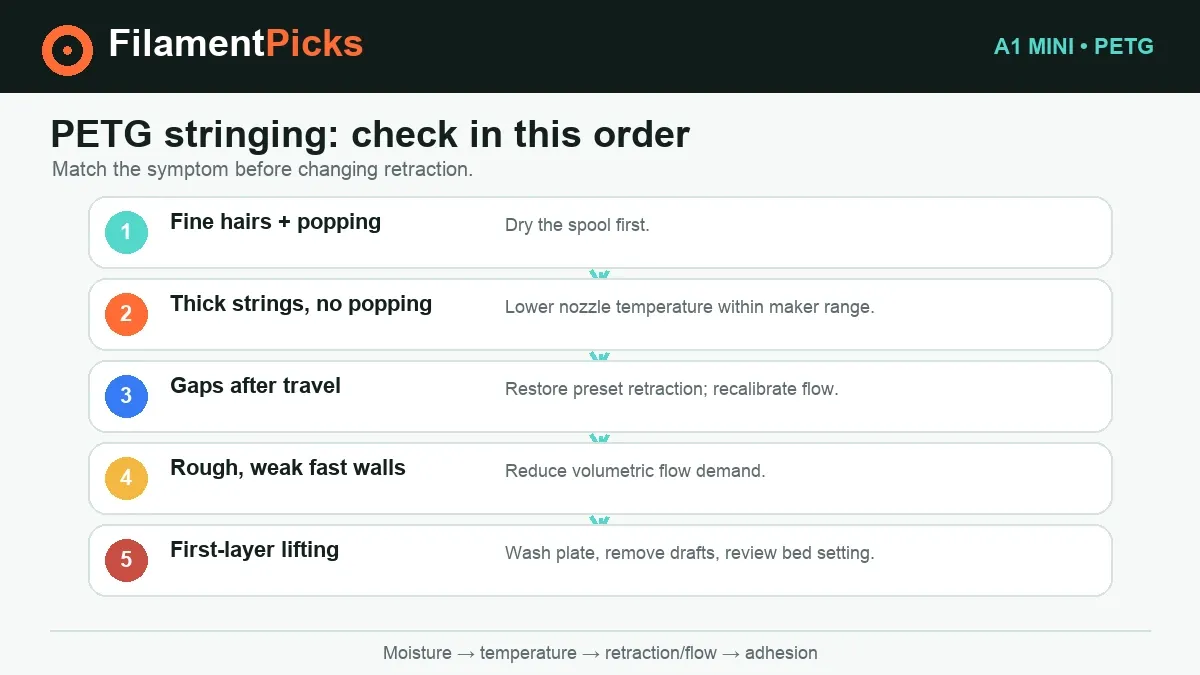
PETG stringing fixes in the right order
| Symptom | Most likely check | Next action |
|---|---|---|
| Fine hairs plus popping | Moisture | Dry the spool; do not compensate with extreme retraction. |
| Thick strings, no popping | Nozzle too hot for this speed | Lower 5°C and repeat the same test. |
| Gaps after travel | Retraction too aggressive or flow untuned | Return toward the preset and calibrate flow. |
| Rough, weak walls at speed | Volumetric flow too high | Reduce the flow cap or speed before adding heat. |
| First layer lifts | Dirty plate, draft or low bed heat | Wash the plate, remove drafts, then raise bed 5°C if needed. |
For a deeper symptom-by-symptom decision tree, use our PETG stringing fixes. If you are still choosing a spool, the best filaments for the A1 Mini guide separates easy PETG options from materials the open printer should avoid.
Bambu A1 Mini PETG settings also change with color, nozzle wear and ambient drafts. Save the tuned profile by brand and color, then retest after opening a new spool. For functional parts, validate dimensions and layer adhesion before raising flow. These Bambu A1 Mini PETG settings are a documented baseline, not a speed guarantee.
Bambu A1 Mini PETG settings FAQ
Can the Bambu A1 Mini print PETG?
Yes. Bambu Lab lists PETG as ideal for the A1 Mini. Its 300°C hotend and 80°C maximum bed cover normal PETG printing ranges. The spool profile and moisture condition still determine the best result.
Should I use the Generic PETG or Bambu PETG HF profile?
Use Bambu PETG HF only for that material or a filament maker that explicitly tells you it is compatible. High-flow PETG can sustain a different flow rate from conventional PETG. For an unknown spool, duplicate Generic PETG and tune the copy.
Does PETG work through the AMS lite?
Standard PETG can, provided the spool is physically suitable and feeds smoothly. Check the spool maker’s guidance and Bambu’s current compatibility information. Drying is separate: AMS lite does not actively dry filament.
Why does PETG still string after I increase retraction?
Moisture and excess nozzle temperature are frequent causes. Dry the spool, repeat a fixed temperature test, and only then make small retraction changes. More retraction is not automatically better on a direct-drive toolhead.
What is the best layer height for a 0.4 mm nozzle?
Use the stock 0.20 mm process as a dependable baseline. A lower layer height favors detail; a higher compatible process favors throughput. Layer height does not replace filament flow calibration.
Keep PETG dry
A temperature-controlled dryer or dry box can help when moisture causes popping, bubbles or sudden stringing.
Browse dryers on Amazon →Compare PETG colors
Choose the exact PETG formula first, then use its own TDS instead of copying a high-flow profile.
Use code BALUTAVLAD at checkout.
Explore Polymaker PETG →Official sources
- Bambu Lab — A1 Mini specifications (build volume, hardware limits and supported materials)
- Bambu Lab — PETG HF product data and printing guidance (temperature, bed, speed, drying and storage humidity)
- Bambu Lab Filament Guide (material comparison and manufacturer ranges)