

Disclosure: FilamentPicks is reader-supported. Purchases through links on this page may earn us a commission at no extra cost to you. As an Amazon Associate we earn from qualifying purchases. Always give the filament maker’s label and the current Bambu profile priority over editorial starting values.
Reliable Bambu P1S PETG settings begin with a dry spool and the correct material preset, not a collection of extreme speed, fan and retraction tweaks. The enclosed P1S is mechanically capable of moving very fast, but a PETG profile succeeds only when the hotend can melt material at the requested volumetric rate and the cooling system preserves both overhangs and layer adhesion.
What the P1S hardware changes for PETG
Bambu Lab lists PETG as an ideal P1S material. The printer has a 300°C all-metal hotend, a 100°C maximum bed, a 256 × 256 × 256 mm build volume, an auxiliary part-cooling fan and a chamber-regulator fan. The enclosure reduces room drafts, but it does not make one temperature or fan percentage correct for every PETG.
The P1S specification also quotes up to 500 mm/s toolhead motion and a 32 mm³/s maximum hotend-flow test performed with Bambu ABS at 280°C. Neither figure is a PETG profile. A standard PETG may reach its clean flow ceiling well before the printer reaches either hardware number. Legacy Bambu PETG HF was formulated differently and retains its own faster preset for existing spools.
If you need a broad comparison across Bambu printers, use our complete PETG settings guide. This page stays focused on P1S-specific decisions: passive enclosure heat, asymmetric auxiliary cooling and flow-limited high-speed printing.
Bambu P1S PETG settings: a reliable baseline profile
| Profile | Nozzle / bed | Flow and cooling | Important limit |
|---|---|---|---|
| Generic PETG — current P1S profile | 255°C; profile range 220–270°C / 70°C bed | 12 mm³/s; flow 0.95; fan 40–90% | Use the third-party spool’s TDS and calibrate a copy. |
| Bambu PETG HF — legacy P1S profile | 230°C first layer, 245°C after / 70°C bed | 21 mm³/s; flow 0.95; fan 20–40%, overhang 100% | For existing HF spools only; use the dedicated profile with the standard P1S hotend. |
| Bambu PETG HF — legacy product guardrails | 230–260°C / 65–75°C with glue | Below 300 mm/s; drying 65°C for 8 h | Keep printing/storage below 20% RH; product limits outrank a wider internal range. |
These are Studio profile baselines, not proof that every brand or color behaves identically. Pigments and additives alter melt behavior; even two colors from one product line can calibrate differently. Save separate filament profiles when a flow or temperature test reveals a meaningful difference.
Build the profile in a repeatable order
- Dry before tuning. Moist PETG can pop, haze, string and lose strength. Changing retraction while the spool is wet creates a misleading profile. For an existing PETG HF spool, Bambu’s original product guidance requires pre-drying and recommends keeping it below 20% relative humidity while printing or stored.
- Clean and identify the plate. Select the actual plate in Bambu Studio, wash it with dish soap and water, and handle only the edges. Use glue where the plate or filament instructions request it; with PETG, it can provide a protective separation layer.
- Start from the closest named preset. For an existing PETG HF spool, use its dedicated legacy profile. For current PETG Basic or another formula, use the exact matching profile and do not reuse HF settings. Use a supported manufacturer preset when available, or duplicate Generic PETG for an unlisted conventional material.
- Run flow dynamics, then flow rate. Pressure behavior and extrusion multiplier solve different errors. Calibrate both for a new brand or materially different color.
- Find the usable temperature. Print the same small temperature test in 5°C steps inside the label range. Judge layer adhesion, bridging, corners and strings together.
- Find maximum volumetric speed last. Increase material flow only after temperature and flow ratio are stable. Leave a margin below the first visible under-extrusion point.
For drying methods and post-drying storage, follow our Bambu PETG drying guide. A sealed spool that prints quietly is a much better calibration subject than a damp one straight from an open shelf.
P1S enclosure, chamber fan and auxiliary fan
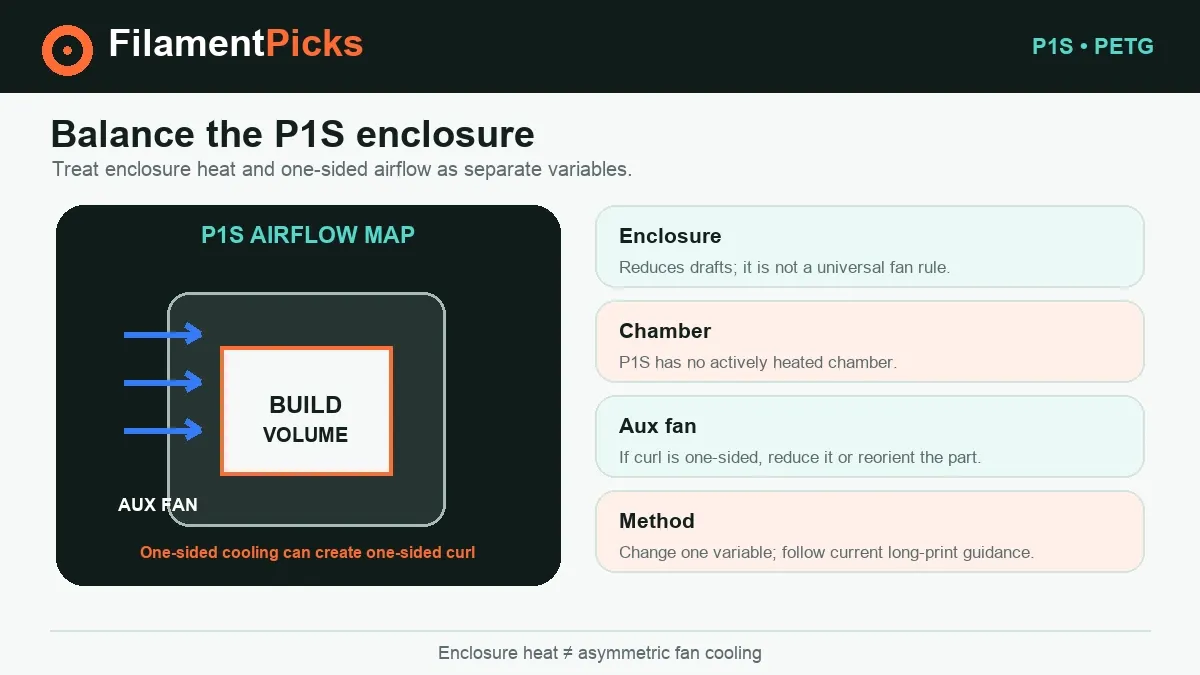
The P1S enclosure gives PETG protection from sudden room airflow, but PETG normally does not require an actively heated chamber. There is no single mandatory “door closed” rule for every plate, room and job. Begin with the current Bambu machine and filament profiles. If a long print makes the chamber unusually warm, follow Bambu’s current ventilation guidance for your plate and material instead of chasing a fixed chamber temperature.
The auxiliary fan blows from one side. High auxiliary airflow can make the fan-facing side cool differently, especially on large flat parts. If one side curls or looks markedly different, test a lower auxiliary-fan value or reorient the model. Do not change auxiliary, part and chamber fans simultaneously; you will not know which change helped.
For routine layers, PETG generally benefits from less cooling than PLA. The Generic PETG baseline uses 40–90%, while the legacy HF profile uses 20–40%, with 100% reserved for HF overhang handling. Use those as preset behavior rather than locking one percentage across every layer. Use less fan when functional parts fracture along layer lines.
The P1S machine preset currently uses 0.8 mm retraction at 30 mm/s. Keep that as the first test; it is not a universal cure. Drying, temperature and travel should be checked before increasing retraction.
Strong-part rule: A glossy surface is not proof of a strong bond, and a powerful fan is not automatically better cooling. Break a small two- or three-wall test coupon across the layers before committing to a load-bearing print.
Choose settings for strength or surface finish
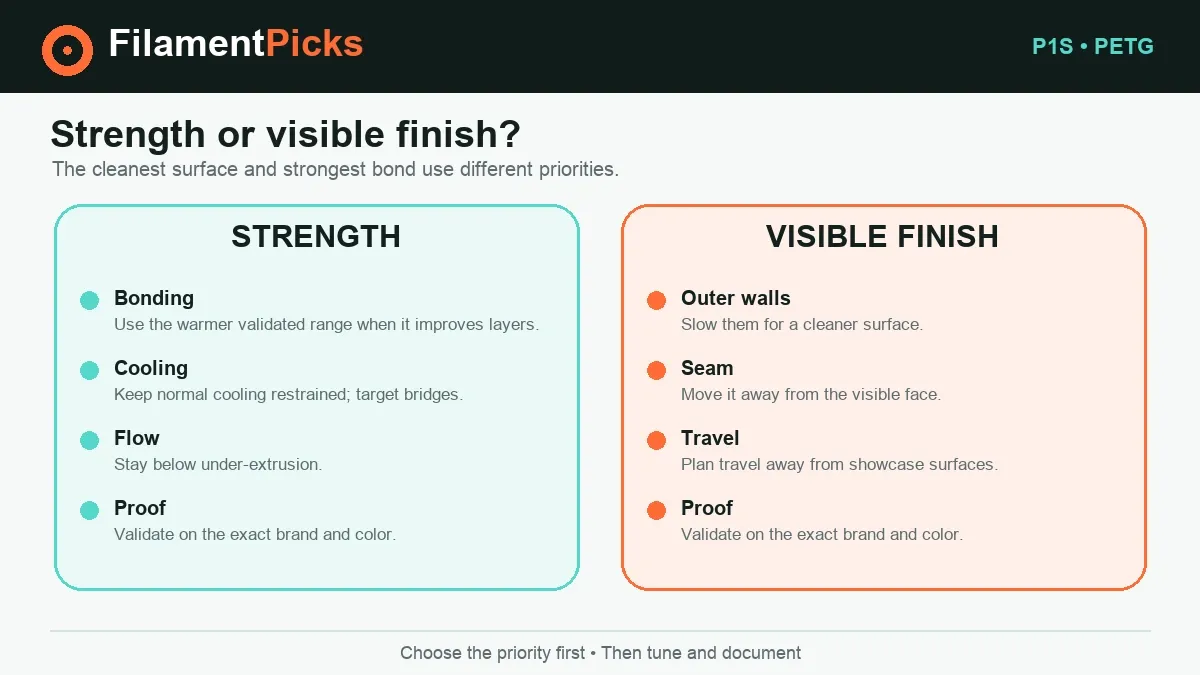
For strong functional PETG
- Stay in the upper half of the validated nozzle range when the layer-bond test improves there.
- Use restrained normal-layer cooling, with targeted bridge cooling rather than full fan everywhere.
- Keep volumetric flow comfortably below the point where the extrusion line turns thin or rough.
- Prefer more perimeters and a sensible wall order over excessive infill.
For cleaner visible surfaces
- Slow outer walls independently while leaving safe inner-wall and infill speeds higher.
- Place or paint the seam deliberately and enable travel choices that avoid crossing visible walls when appropriate.
- Lower nozzle temperature in 5°C steps only while layer adhesion remains good.
- Calibrate each brand/color rather than hiding inconsistent flow with random retraction changes.
If you are selecting material rather than tuning an existing spool, compare our best P1S filament picks and the Bambu filament compatibility checker.
P1S PETG troubleshooting
| Problem | Check first | Controlled fix |
|---|---|---|
| Popping and rough bubbles | Spool moisture | Dry to the manufacturer’s schedule; store sealed afterward. |
| Fine strings everywhere | Moisture, then temperature | Dry; reduce nozzle 5°C if bond remains good; tune retraction last. |
| Weak or matte fast walls | Maximum volumetric speed | Reduce the flow cap; confirm nozzle is within the label range. |
| One side curls | Auxiliary-fan direction | Reduce aux cooling or reorient the part; repeat unchanged geometry. |
| Layers split | Too much cooling or too little heat | Reduce normal-layer fan, then raise nozzle 5°C within spec. |
| PETG will not release | Plate still hot / no release layer | Let it cool fully; use the specified glue next time. |
Persistent stringing deserves a fixed diagnostic sequence, not ten simultaneous changes. Our PETG stringing decision tree walks through moisture, temperature, travel and retraction in order.
Bambu P1S PETG settings FAQ
Can the P1S print PETG reliably?
Yes. Bambu Lab lists PETG as ideal for the P1S. Use the correct plate and filament profiles, dry moisture-affected spools, and calibrate flow when changing brands.
Should the P1S door be open or closed for PETG?
There is no universal position for every ambient temperature, plate and job. Start with current Bambu guidance and the stock profiles. The enclosure should prevent drafts without creating unnecessary heat buildup; monitor long prints and ventilate as Bambu recommends for your setup.
Can I print generic PETG at 300 mm/s?
Do not assume so. Bambu’s legacy below-300 mm/s statement belongs specifically to PETG HF, not current PETG Basic or generic PETG. Test the third-party material’s maximum volumetric flow and let that cap the slicer.
Should I change retraction on the P1S?
Only after drying the spool and testing nozzle temperature. The P1S is direct drive; large Bowden-style retraction values are inappropriate. Make small changes around the preset and watch for gaps after travel.
Is glue required for PETG on PEI?
Follow the exact plate and filament instructions. Glue can improve consistency and, importantly, act as a release layer because PETG may bond aggressively to smooth surfaces. Always let the plate cool before removal.
Control PETG moisture
Use a dryer or dry box when the spool pops, bubbles or suddenly strings despite a stable profile.
Browse dryers on Amazon →Compare PETG formulas
Select the exact PETG product first and keep conventional PETG separate from high-flow profiles.
Use code BALUTAVLAD at checkout.
Explore Polymaker PETG →Official sources
- Bambu Lab — P1S Quick Start Guide and specifications (hardware, cooling, bed and supported materials)
- Bambu Lab — P1 Series comparison (P1S enclosure, fans and material capability)
- Bambu Lab — current PETG Basic product guidance (drying, storage and compatibility)
- Bambu Lab — legacy PETG HF product guidance (printing and drying ranges for existing spools)
- Bambu Studio 2.7.1.62 bundled filament profiles (version-pinned profile source)
- Bambu Lab Filament Guide (manufacturer material comparison)