

FilamentPicks is reader-supported. Some links are affiliate links; as an Amazon Associate we earn from qualifying purchases at no extra cost to you. Polymaker links may also earn us a commission. Recommendations are based on manufacturer specifications and documented maker feedback, not undisclosed hands-on lab testing.
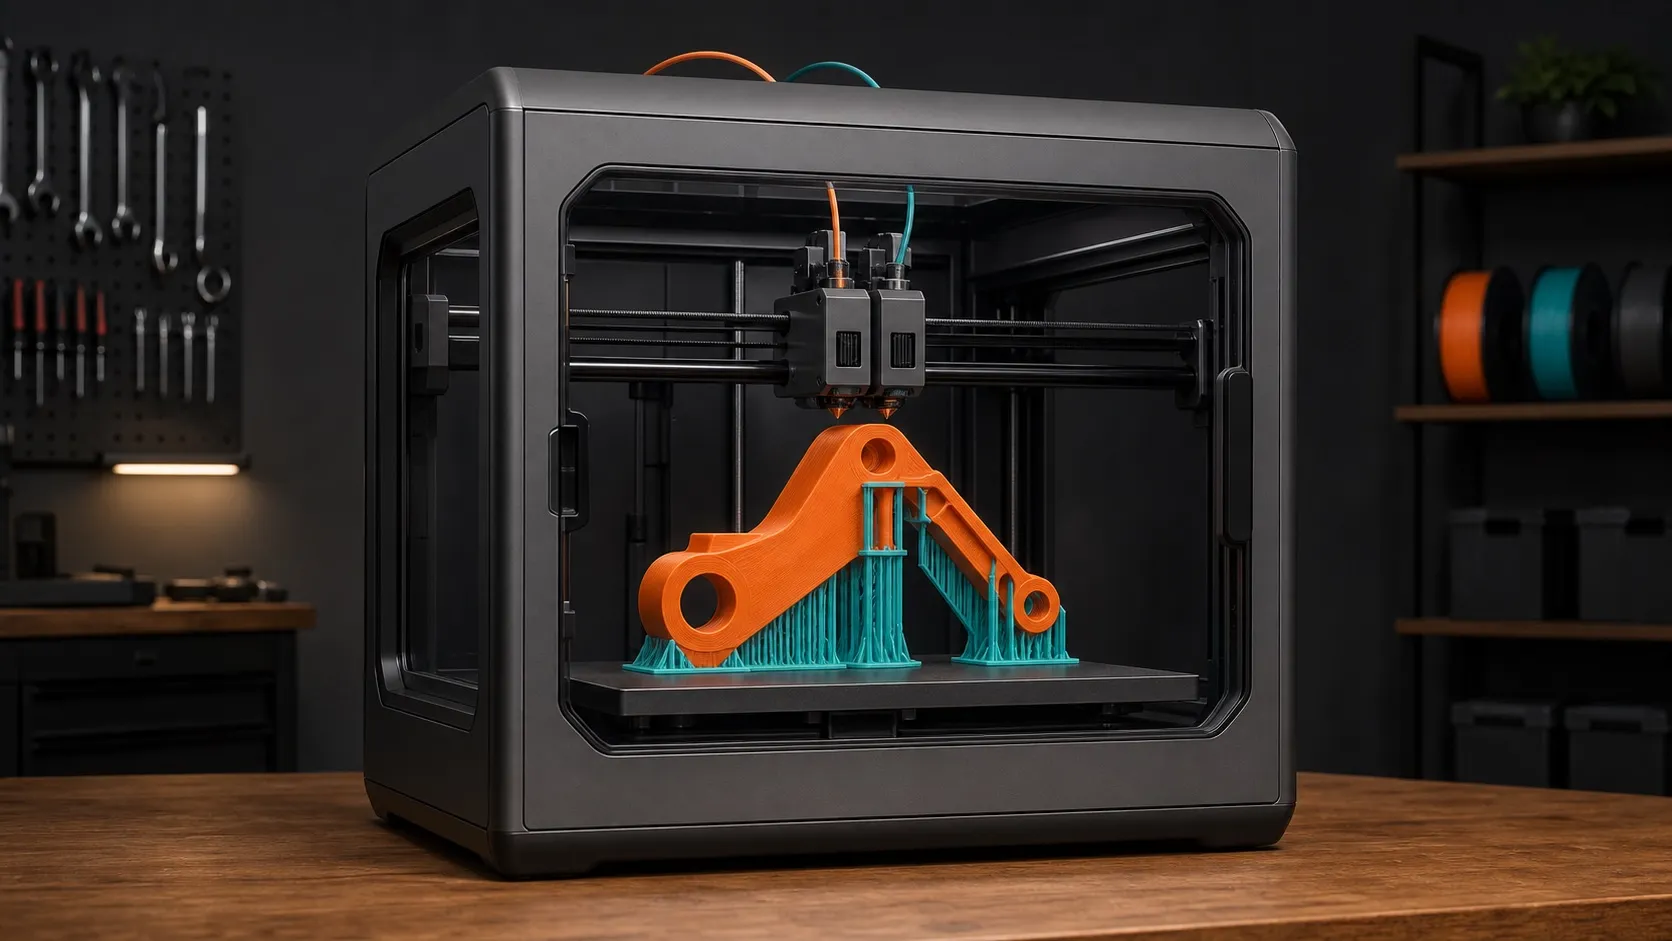
Bambu X2D dual-nozzle filament pairing works best when the main direct-drive nozzle prints the model and the auxiliary Bowden-fed nozzle handles a compatible support-interface material. PLA with PETG is the most useful low-cost release pair, while dedicated support filaments are the safer choice when temperatures, adhesion, or moisture make cross-material pairing unreliable.
Bambu X2D dual-nozzle filament pairing: quick table
| Model material | Interface material | Best use | Main caution |
|---|---|---|---|
| PLA | PETG | Cheap, clean breakaway interface | Use PETG only at the interface, not the entire support body |
| PETG | PLA | Reverse release interface | Dry PETG and tune purge to prevent contamination |
| PLA | Support for PLA | Predictable removal and surface finish | Higher material cost |
| ABS/ASA | Support for ABS | Enclosed engineering prints | Match chamber and nozzle temperature windows |
| PA | Support for PA/PET or compatible PVA | Functional nylon parts | Moisture control is critical |
| Same polymer | Second color of same polymer | Logos and two-color parts | Strong bonding means it is not a release interface |
| Rigid polymer | TPU for AMS | Flexible inserts or grips | Validate adhesion and use an approved auxiliary path profile |
How the two X2D extrusion paths differ
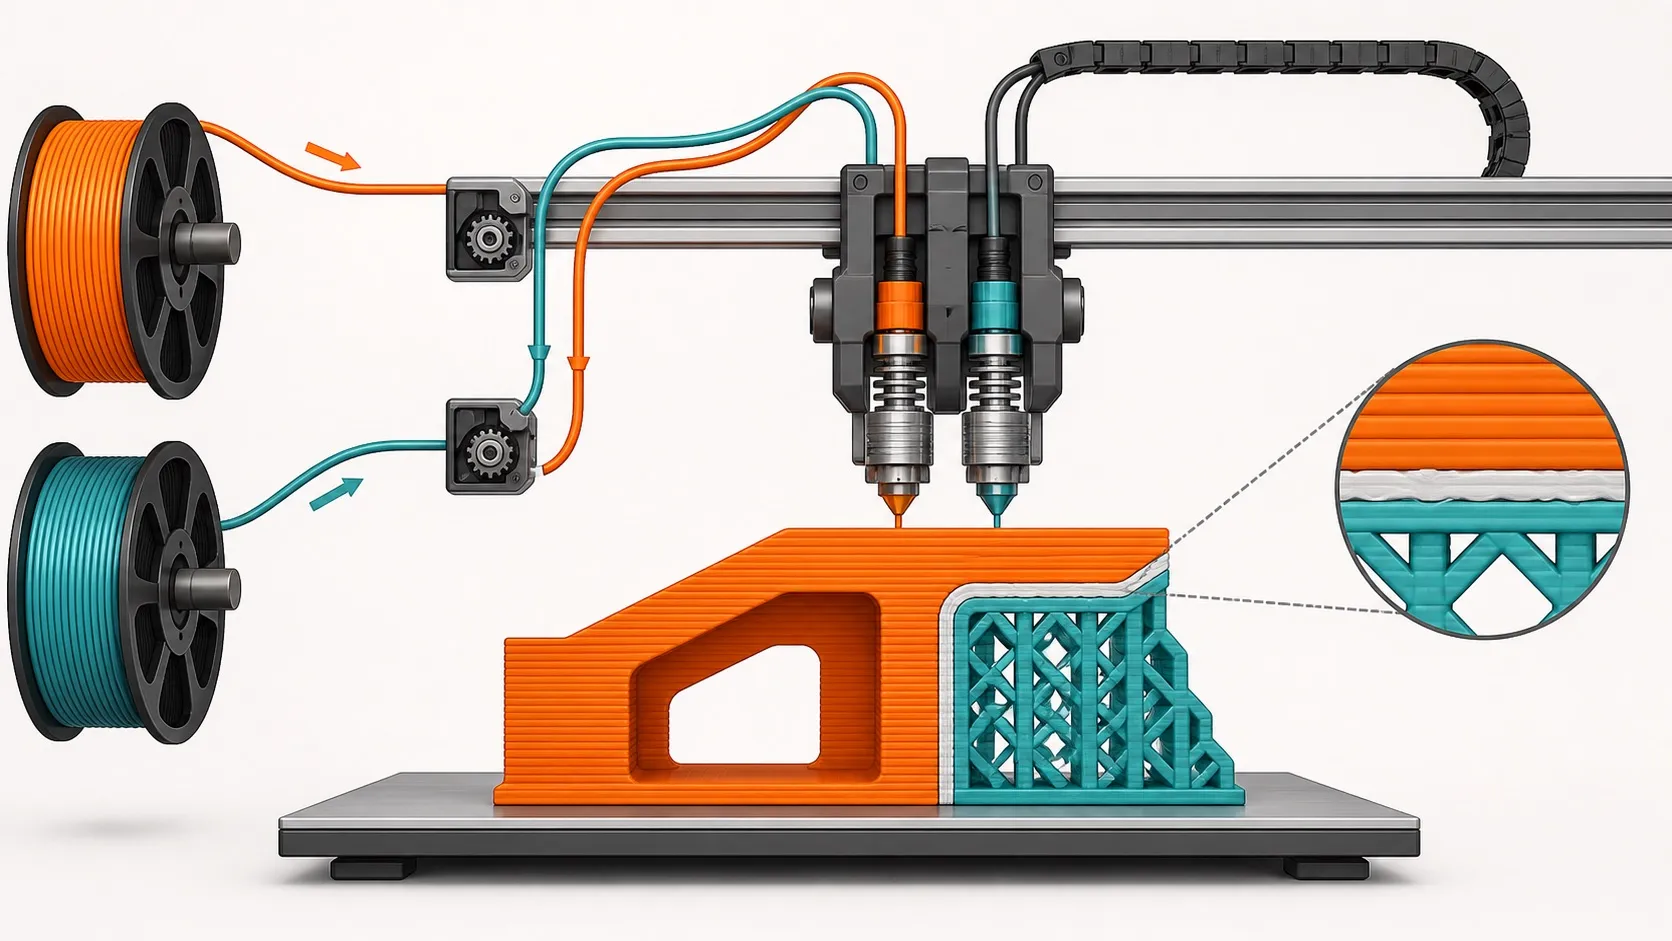
Bambu X2D dual-nozzle filament pairing relies on two different feed architectures. The main nozzle is direct drive and should handle the model material, especially demanding or flexible filaments. The auxiliary nozzle is Bowden-fed and is optimized for the second material, often the support interface. Bambu Lab specifically recommends the left/main side for the model and the right/auxiliary side for support.
This asymmetry is important for Bambu X2D dual-nozzle filament pairing. A material that prints well through the main extruder is not automatically ideal for the auxiliary path. Flexible, abrasive, or high-drag filaments need an approved profile and careful validation. For the broad material matrix, see our Bambu X2D filament compatibility guide.
The current same-nozzle-size limitation
For Bambu X2D dual-nozzle filament pairing, Bambu Studio does not currently support mixing different nozzle diameters in one dual-nozzle print. Both hotends should use the same nozzle size for the job. You can still assign different materials and colors, but do not plan a 0.4 mm model nozzle with a 0.2 mm detail nozzle in one print unless software support is officially added.
Why PLA and PETG make a useful support pair
In Bambu X2D dual-nozzle filament pairing, PLA and PETG can adhere enough to build a controlled interface but usually do not fuse as strongly as two layers of the same polymer. That difference allows a dense interface to support the model while remaining easier to separate after cooling. The pairing can improve supported surfaces without buying a specialty material.
For efficient Bambu X2D dual-nozzle filament pairing, use the alternate polymer only for the support-interface layers. Print the support body in the model material. This reduces swaps, purge volume, prime-tower growth, and print time. It also lowers the chance that a small amount of the interface polymer contaminates a structural wall.
Best Bambu X2D dual-nozzle filament pairing options
PLA model + PETG interface
This is the best starting point for ordinary prototypes. Both materials are common, the temperature windows are manageable, and the interface usually separates cleanly. Dry the PETG, increase purge enough to prevent smearing, and inspect the first interface transition in the slicer.
PETG model + PLA interface
The reverse pairing can work equally well. PETG stringing or moisture can leave residue in the nozzle, so run a clean filament path and do not reduce purge aggressively on the first attempt. Let the print cool before removal because warm PETG is easier to deform.
PLA + dedicated Support for PLA
A purpose-built support interface costs more than PETG but removes some uncertainty. It is the better choice for long jobs, important cosmetic surfaces, or workflows where reliability matters more than the lowest material cost. Our guide to the best support filament for Bambu Lab compares the major types.
ABS or ASA + Support for ABS
High-temperature model materials need an interface that tolerates the same chamber and nozzle environment. Keep the enclosure stable and avoid a support polymer whose softening range is too low. If the temperatures overlap poorly, the auxiliary nozzle may ooze while the model nozzle is active.
PA + compatible support material
Nylon pairing is controlled by moisture before anything else. Dry both spools, keep them in a dry feed system, and choose a support material whose printing range matches the PA profile. PVA can be useful when officially compatible, but it is extremely moisture-sensitive and needs more careful storage and purging.
Filament Track Switch and AMS routing
The Filament Track Switch supports two inputs and two outputs. One AMS can feed both extrusion paths, but switching between paths may require retraction and can reduce the speed advantage of the dual-nozzle design. A dedicated feed path for each actively used nozzle is the cleaner arrangement when repeatability and speed matter.
Before a long Bambu X2D dual-nozzle filament pairing job, confirm that every spool is assigned to the intended nozzle in Bambu Studio. The material loaded on the right does not help if the slicer has assigned the support interface to the main nozzle. Review the tool-change timeline and color the preview by filament.
Temperature compatibility matters more than brand
Successful Bambu X2D dual-nozzle filament pairing needs overlapping operating conditions. Compare nozzle temperature, bed temperature, chamber requirement, cooling, and drying needs. Large differences cause one material to ooze, degrade, or refuse to bond during the transition. Generic brand matching is less important than compatible physical behavior.
Start with official profiles, then use the calibration workflow in our Bambu filament settings guide. Change one variable at a time. Flow ratio and pressure advance affect the model, but purge volume and interface spacing usually matter more for material transitions.
Prime tower and purge trade-offs
Bambu X2D dual-nozzle filament pairing reduces repeated flushing compared with a single-nozzle material swap, but it does not eliminate priming. Bambu Studio may still use a prime tower to stabilize pressure and prevent under-extrusion after an inactive period. Do not remove it blindly from a tall or high-value print.
Optimize Bambu X2D dual-nozzle filament pairing by limiting the alternate material to true interface layers, positioning the model efficiently, and checking the number of tool changes. A dense interface covering a small area is usually cheaper than printing the entire support tree in specialty filament.
PLA and PETG pairing
Compare current PLA and PETG availability for a practical cross-material support interface.
Check on Amazon →Build a calibrated material pair
Shop Polymaker materials directly and use code BALUTAVLAD for 15% off your first order.
Shop Polymaker →Auxiliary-nozzle cautions
- Use the main direct-drive path for the model material by default.
- Do not assume every flexible filament is suitable for the Bowden-fed auxiliary path.
- PLA Aero is not among the recommended auxiliary materials in Bambu guidance.
- Use caution with fiber-filled abrasives and confirm the hotend and feed-path recommendation.
- Keep both nozzle diameters identical until Bambu Studio officially supports mixed sizes.
- Dry hygroscopic support materials immediately before use.
X2D dual-nozzle setup checklist
- Install matching nozzle diameters.
- Load the model filament in the main/left path.
- Load the support-interface material in the auxiliary/right path.
- Select correct manufacturer or calibrated profiles.
- Assign only the interface to the alternate material.
- Inspect purge, prime tower, and tool changes in Preview.
- Print a small supported coupon before the full model.
- Let the print cool and evaluate both removal and underside finish.
Troubleshooting common pairing failures
The interface fuses to the model
Confirm the slicer assignments, reduce unwanted mixing with more purge, and verify the interface material is not the same bonding family as the model. Let the part cool completely before separation.
The interface does not hold during printing
Decrease the interface gap carefully, verify temperature overlap, and check for wet filament or under-extrusion after tool activation. Too little temporary adhesion can be as damaging as too much.
The auxiliary nozzle oozes
Dry the filament, use the correct standby behavior, keep the prime tower, and inspect whether the inactive material is being held too hot for too long.
Frequently asked questions
Can the X2D print PLA and PETG together?
Yes, especially when one polymer is used only as a support interface for the other. They are not a reliable choice for a structural multi-material bond.
Can I use different nozzle sizes?
Not in the same dual-nozzle print under the Bambu Studio limitation current at the time of review. Use matching nozzle diameters and verify release notes before planning otherwise.
Should support go through the auxiliary nozzle?
That is the recommended default. Use the main direct-drive nozzle for the model and the auxiliary nozzle for the support-interface material.
A 30-minute pairing validation print
Do not make a complex part the first test of a new combination. Validate Bambu X2D dual-nozzle filament pairing with a small stepped coupon that places a flat roof over a dense support interface. Add a vertical color-change wall and a short bridge. This single model exposes interface release, nozzle activation, contamination, ooze, and underside quality without consuming much filament.
Slice the coupon with the same layer height, nozzle diameter, temperatures, and support settings planned for the production part. Use at least three interface layers where the geometry allows it. Keep the prime tower enabled for the first test and avoid experimental purge reductions. The goal is to establish a reliable baseline, not to minimize every gram immediately.
After cooling, score the Bambu X2D dual-nozzle filament pairing result in four categories: interface removal, supported-surface finish, dimensional damage, and contamination. A good interface peels away without tearing the model, leaves no welded patches, and does not create large gaps under the roof. Photograph both the interface and the model underside for comparison with the next test.
How to tune a pair without losing the baseline
If removal is difficult, first confirm that the correct filament was assigned to the interface. Then change only one setting: interface spacing, temperature, cooling, or purge. Reprint the same coupon and write the result beside the previous value. Bambu X2D dual-nozzle filament pairing becomes predictable when each adjustment has clear evidence behind it.
If the supported face is rough but the interface removes cleanly, reduce the vertical separation slightly or increase interface density. If the face contains streaks from the alternate polymer, increase purge and inspect the prime tower. If the interface collapses, check moisture, flow, and temperature compatibility before making the gap tighter.
Choose quality, speed, or lowest material cost
There is no universal best setting. For cosmetic surfaces, prioritize a dense interface and stable priming. For prototypes, PLA/PETG can deliver adequate release at low material cost. For repeat production, a dedicated support filament may justify its price by reducing failed parts and manual cleanup. The best Bambu X2D dual-nozzle filament pairing depends on the value of the model, not only the price per kilogram.
Track print time, support material used, purge waste, removal time, and the number of rejected parts. A combination that uses five extra grams but saves twenty minutes of careful cleanup can be the cheaper business choice. For one-off hobby prints, however, a common cross-material interface may be perfectly rational.
Production readiness checklist
- The pairing passed a small support-interface coupon.
- Both spools were dried and remained protected during printing.
- Tool assignments were verified in the sliced preview.
- The nozzle diameters match.
- The prime tower and purge volumes were tested, not guessed.
- The interface is used only where it improves removal.
- A failed-nozzle or runout recovery plan is available for a long job.
Once the same Bambu X2D dual-nozzle filament pairing passes two identical coupons, save the project as a named preset with material brands, colors, drying history, and date. That preset is far more valuable than a generic internet setting because it represents the exact spools and hardware in your workflow.
Bottom line
The best Bambu X2D dual-nozzle filament pairing is the one that combines a clean release interface with compatible temperatures and reliable feed behavior. Begin with PLA/PETG or a dedicated support material, reserve the alternate polymer for interface layers, and verify every tool change in preview. For more material choices, compare our best filament for Bambu X2D and general Bambu filament compatibility resources.
Official references: Bambu Lab X2D overview and main vs. auxiliary extrusion guide.