

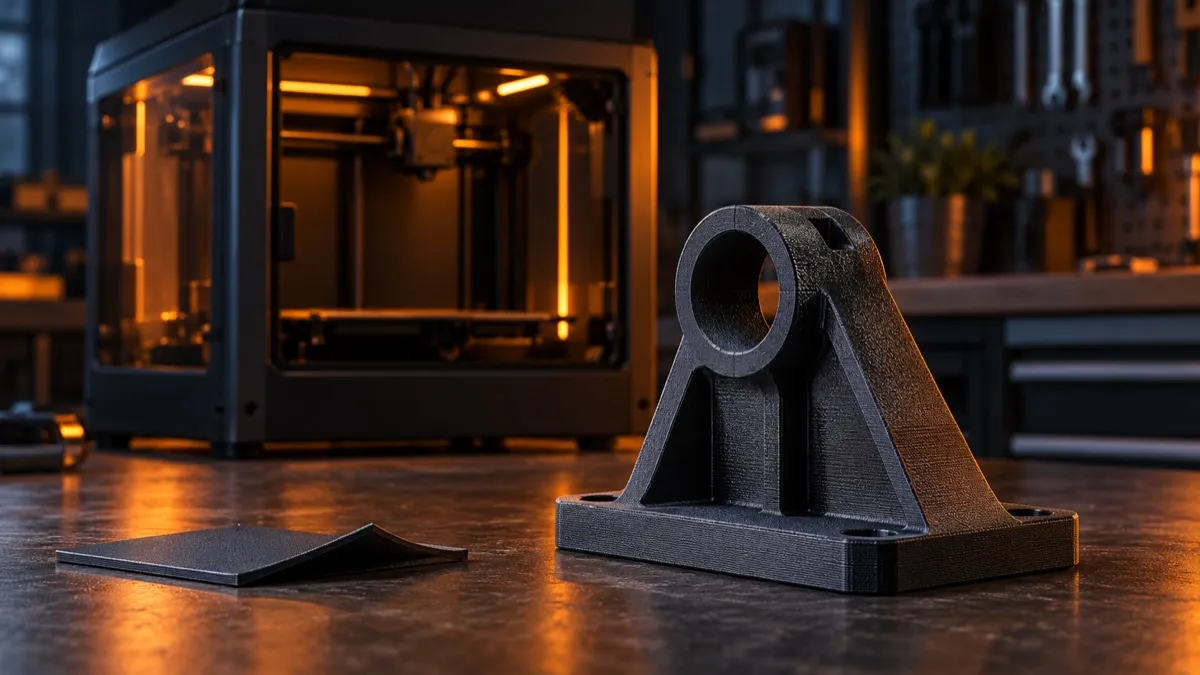
Bambu P2S ASA settings should start from the current Bambu Studio profile, then be adjusted for the exact spool, plate, nozzle and part geometry. The P2S is well suited to ASA because its enclosed build volume and Adaptive Airflow system can retain heat, but the same material can still warp, split or lose bed adhesion when chamber temperature changes too quickly.
Bambu P2S ASA settings: safe starting table
| Setting | Starting point | What to verify |
|---|---|---|
| Filament profile | Exact Bambu ASA profile or Generic ASA | Do not import a P1 profile blindly; the P2S hotend and extruder differ |
| Nozzle | Within the spool maker’s stated range; Bambu ASA guide: 240–280 °C | Raise only when layer bonding is weak or flow is unstable |
| Bed | Within the selected plate/profile range; Bambu guide: 90–100 °C for PEI | Confirm the exact plate is selected in Bambu Studio |
| Part cooling | Low; use more only for bridges and small details | Too much fan increases corner lift and layer splitting |
| Auxiliary fan | Off for most ASA parts | One-sided cooling can create asymmetric warping |
| Door and lid | Closed, with a stable chamber | Follow the current P2S profile and safety guidance |
| First-layer speed | Conservative stock-profile speed | Watch for continuous, lightly compressed lines |
| Volumetric speed | Keep the profile limit until a controlled test succeeds | A hotter nozzle does not guarantee sufficient melt capacity |
This table is deliberately conservative. Pigments, fillers and third-party formulations change flow and shrinkage. A working Bambu P2S ASA settings profile should be copied before editing; label the spool and change one variable at a time.
Preparation that matters more than one perfect temperature
Dry the spool when print behavior suggests moisture
ASA is less moisture-sensitive than nylon, but storage history still matters. Hissing, small bubbles, rough walls and inconsistent extrusion are reasons to dry the spool according to its manufacturer’s limit. Bambu’s filament guide describes drying as optional for standard ASA and lists an 80 °C, eight-hour blast-oven condition for its material. Do not assume every spool, cardboard core or dryer is safe at that temperature.
Clean and identify the build plate
Wash a contaminated PEI surface with warm water and plain dish soap, rinse it thoroughly and avoid touching the print area. Confirm that the plate selected in Bambu Studio matches the installed plate. A temperature intended for Smooth PEI can behave differently on Textured PEI, and a mismatched plate selection can invalidate an otherwise good profile.
Use a brim as mechanical insurance
A brim is not a substitute for correct thermal management, but it increases the footprint of sharp corners and long edges. Large flat parts, thin walls and rectangular enclosures benefit most. Add mouse ears only where geometry concentrates stress; covering the entire bed with unnecessary brim increases cleanup without fixing chamber drafts.
A repeatable P2S ASA calibration workflow
- Start with the exact profile. Select the current P2S printer preset, the installed nozzle and the correct plate.
- Print a first-layer patch. Verify line continuity and adhesion before evaluating dimensional accuracy.
- Print a compact temperature test. Use the spool maker’s range and look for the lowest temperature that still produces strong layer bonding.
- Calibrate flow ratio. Do this after temperature, because melt behavior affects the result.
- Calibrate flow dynamics. Use the P2S automatic routine or a controlled manual method.
- Validate maximum volumetric speed last. A beautiful slow cube does not prove that a high-flow section will remain stable.
- Print a representative part. Include the same footprint, wall thickness and overhangs as the final job.
For the distinction between flow ratio, pressure response and melt-throughput limits, use the Bambu flow calibration guide. If the spool is third-party, create a clone instead of overwriting a stock profile; the third-party filament setup guide shows the safer workflow.
Validate the profile against the actual ASA part
A calibration cube is useful for checking extrusion, but it is a weak predictor of warping. The final part may keep heat in a thick base, concentrate shrinkage at a screw boss or place a long straight edge beside the chamber wall. After the small calibration tests pass, the Bambu P2S ASA settings must be challenged with a shortened or sectioned version of the real model. Keep the same wall count, bottom thickness, orientation, brim and approximate footprint.
| Part type | Validation focus | Useful first adjustment |
|---|---|---|
| Small outdoor bracket | Layer bonding around fasteners | Add perimeters and fillets before raising infill |
| Wide electronics enclosure | Corner lift and flatness | Stabilize the chamber, add a brim and soften sharp corners |
| Tall thin cover | Layer splitting and oscillation | Reduce abrupt cooling and keep outer-wall speed consistent |
| Snap-fit clip | Orientation and strain at the root | Rotate the part so the layer seam does not become the hinge |
| Cosmetic exterior panel | Gloss transitions and seam placement | Use steady visible-wall speed and place the seam deliberately |
Measure the test only after it has cooled to room temperature. A warm ASA part can move when it is removed from the plate, and a dimension measured immediately after printing may not represent its stable size. For assemblies, print the mating feature at the same time and test the pair rather than relying only on nominal CAD clearance.
Keep a simple ASA profile record
Record the brand, product, color, spool lot, nozzle size, plate, drying history and calibration date. Add the tested temperature, flow ratio and volumetric limit plus a note about the largest successful footprint. This turns a one-off success into a reusable P2S profile and prevents an old value from being applied to a different formulation with the same “ASA” label.
Review the saved Bambu P2S ASA settings whenever the nozzle diameter, plate, supplier or color changes. Keeping the old profile as a known-good reference makes every adjustment traceable.
How to stop ASA warping on the Bambu P2S
| Symptom | Likely cause | First correction |
|---|---|---|
| One corner lifts | Dirty plate, concentrated stress or local draft | Clean the plate, add a brim and remove direct airflow |
| All corners curl | Bed/chamber too cool or footprint too large | Precondition the enclosure and reduce thermal shock |
| Horizontal cracks | Part cooling too high or chamber temperature unstable | Reduce cooling and keep the door/lid state consistent |
| Bottom edge bulges | Excessive first-layer heat or compression | Use the plate-specific profile and inspect first-layer flow |
| Surface turns glossy and soft | Nozzle too hot or minimum-layer time too short | Reduce temperature slightly or slow small layers |
| Weak layer bonding | Nozzle too cool, wet filament or excessive fan | Dry if needed, reduce cooling, then test a small temperature increase |
Do not open the enclosure immediately after a large ASA print finishes. Let the part and plate cool gradually. Sudden cooling can release stored stress even when the print looked perfect during the final layer.
Recheck the Bambu P2S ASA settings after any major change in room temperature or enclosure airflow, because the same large footprint can behave differently across seasons.
Settings for strong functional ASA parts
More walls usually improve functional strength more predictably than extreme infill. Start with three or four walls, orient the part so the principal load does not pull layers apart, and use radiused corners where possible. ASA is valuable outdoors because it generally handles UV exposure better than ABS, but a printed part still has layer-dependent strength and can creep under sustained load.
For material selection rather than slicer tuning, compare the application with the strongest filament options for the P2S. The broader Bambu ASA printing guide covers material handling across the printer family, while this page remains focused on P2S setup.
Balance surface quality, speed and dimensional accuracy
Do not use outer-wall appearance as the only success criterion. A hotter, faster profile can look glossy while producing softer corners or hidden under-extrusion at high flow. A cooler profile may preserve small details but weaken layer bonding. Evaluate at least one breakable coupon, one measured feature and one visible wall before approving a production setting.
For production work, Bambu P2S ASA settings are not complete until the same profile passes both a visual check and a dimensional or mechanical check tied to the real use case.
For fitted outdoor parts, include holes, bosses and snap features in the validation model. Use the slicer’s hole compensation only after measuring a repeatable error; compensation cannot correct a part that is being pulled out of shape by warping. If one side is consistently different, investigate cooling and orientation before applying a global dimensional correction.
Speed changes can create bands because melt pressure and surface gloss change together. A modest, steady outer-wall speed often looks better than allowing the printer to alternate between very fast open walls and slow corners. Preserve the tested volumetric ceiling, but remember that acceleration, layer time and overhang rules can still force visible transitions below that limit.
Ventilation and handling
Good Bambu P2S ASA settings reduce print failures, but they do not remove the need for room ventilation and responsible material handling.
Never place a household oven back into food service after using it for filament or printed parts. Do not exceed the spool manufacturer’s drying limit, and keep polymer, cardboard and desiccant away from exposed heating elements.
P2S ASA pre-flight checklist
Use this short check before a long or expensive print. It catches the setup changes that are easy to miss when a profile worked several weeks earlier.
- Confirm that the selected printer, nozzle diameter and build plate match the hardware.
- Check the spool label, storage history and whether the tested profile belongs to the same product and color.
- Inspect the nozzle and build surface, then remove dust, oil and old adhesive residue as the plate maker permits.
- Make sure the room ventilation is operating and the printer is not in a direct draft.
- Review brim, wall count and orientation against the final load and the longest edge on the bed.
- Verify that the auxiliary fan and part-cooling rules have not been inherited from a PLA profile.
- Read the sliced preview for sudden speed changes, unsupported bridges and thin first-layer islands.
- Watch the complete first layer and stop if lines are loose, over-compressed or pulling at sharp corners.
After the job, record whether the footprint stayed flat, whether any layer bands appeared and how easily the cooled part released. A two-line note is enough to improve the next run and is more valuable than trying to remember which setting changed.
Bambu P2S ASA settings FAQ
Should the P2S door stay closed for ASA?
Normally yes, because a stable warm chamber reduces shrinkage gradients. Follow the current printer and filament profile, and maintain room ventilation.
Can I use a P1S ASA profile on the P2S?
Use it only as a reference. Bambu states that the P2S uses different hotend and extruder characteristics, so begin with a P2S-compatible Bambu or Generic profile and calibrate the spool.
Does ASA need a hardened nozzle?
Unfilled ASA does not inherently require hardened steel. Carbon- or glass-fiber ASA is abrasive and should use the nozzle material and diameter specified by the manufacturer, commonly hardened steel with a larger diameter.
Why does a small ASA cube work while a large box warps?
Shrinkage stress increases with footprint and long straight edges. A stable chamber, brim, rounded geometry and slower cooling become more important as the part grows.
Should I dry ASA before every print?
Not necessarily. Dry when storage conditions, the material maker or symptoms justify it. Avoid repeated high-temperature cycles without need.